Rear drag-racing system with solid pillow mounts
The aFe 440-401007-N PFADT drag-racing REAR sway-bar kit includes the splined chromoly torsion bar, orange aluminum arms, two adjustable rear endlinks, solid pillow mounts and moly-nylon bushings. CLOSED-COURSE DRAG RACING ONLY. The current manufacturer explicitly states this system is NOT intended for the street or public roads, and the own manual repeats closed-course racing use. General street/off-road setup or an initial road-driving cycle is not appropriate guidance for this selected race part.
Key Features
- Selected rear-only drag-racing kit: 440-401007-N.
- 31.75mm 4130 chromoly bar with splined ends and clear zinc finish.
- Three adjustment positions using orange 7050-T7 aluminum arms.
- 6061-T6 solid rear pillow mounts with moly-impregnated nylon bushings.
- TWO assembled 3/8-inch rod-end links, aluminum turnbuckles and articulation spacers.
- Manufacturer expressly restricts use to closed-course racing, not street/public roads.
Fitment
For the selected 1997–2013 Corvette C5/C6 rear application, subject to the closed-course race-use restriction. The exact current primary and own selected manual agree on the model-year range. The full selected named table independently supports all TEN original scopes plus Grand Sport 2010–2013 below. No C7/C8 or front-bar application is inferred, and chassis restrictions from different control-arm/camber parts are not borrowed.
| Years |
Make |
Model |
Submodel |
| 1998 |
Chevrolet |
Corvette |
Indianapolis 500 Pace Car |
| 2001-2004 |
Chevrolet |
Corvette |
Z06 |
| 2006-2013 |
Chevrolet |
Corvette |
Z06 |
| 2011 |
Chevrolet |
Corvette |
Z06 Carbon |
| 2009-2013 |
Chevrolet |
Corvette |
ZR1 |
| 2013 |
Chevrolet |
Corvette |
427 |
| 2008 |
Chevrolet |
Corvette |
427 Limited Edition Z06 |
| 2003 |
Chevrolet |
Corvette |
50th Anniversary Edition |
| 2003 |
Chevrolet |
Corvette |
50th Anniversary Edition Pace Car |
| 1997-2013 |
Chevrolet |
Corvette |
Base |
| 2010-2013 |
Chevrolet |
Corvette |
Grand Sport |
Specifications
| Detail |
Value |
| Manufacturer Part Number |
440-401007-N |
| Product type |
Sway Bars |
| Use restriction |
CLOSED-COURSE DRAG RACING ONLY. The current manufacturer explicitly states this system is NOT intended for the street or public roads, and the own manual repeats closed-course racing use. General street/off-road setup or an initial road-driving cycle is not appropriate guidance for this selected race part. |
| Vehicle and named application |
For the selected 1997–2013 Corvette C5/C6 rear application, subject to the closed-course race-use restriction. The exact current primary and own selected manual agree on the model-year range. The full selected named table independently supports all TEN original scopes plus Grand Sport 2010–2013 below. No C7/C8 or front-bar application is inferred, and chassis restrictions from different control-arm/camber parts are not borrowed. |
| Materials / diameter / adjustment |
31.75mm THREE-way adjustable REAR torsion bar, three-piece construction using 4130 chromoly with splined ends and clear zinc finish. Arms are orange-anodized 7050-T7 aluminum with broached splines and laser-etched adjustment marks. The supplied rear solid pillow-block mounts are 6061-T6 aluminum; the bushings are molybdenum-impregnated NYLON. These are not polyurethane bushings. Lightweight 3/8-inch rod-end links use aluminum turnbuckles and articulation spacers. |
| Selected rear-only bill / prose qualification |
ONE assembled REAR sway bar; arms supplied assembled. TWO rear solid pillow mounts and TWO rear solid bushings. ONE hardware bag listing TWO EACH: M12x1.75 flange nuts; 3/8-24 flange nuts; LH jam nuts; RH jam nuts; socket-head cap screws; spacers; turnbuckles; RH studded Heim joints; LH Heim joints. The TWO RH plus TWO LH joints assemble into TWO rear endlinks. The assembly prose says four links, but the selected bill, two rear installation locations and native package photo establish TWO complete links for this rear-only kit; no extra front links or front bar are promised. Centering rings are described by the exact primary and shown in the manual. Factory mounting bolts/nuts are reused. No verified grease pack, replacement control arms, filters or intake couplers are included. |
| Rear endlink assembly and stud torque |
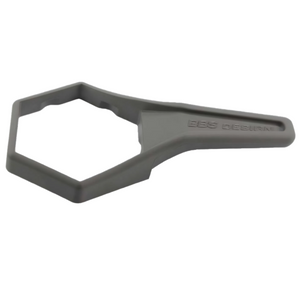
The incomplete turnbuckle wrench flats identify LEFT-hand threads. Assemble TWO rear links to approximately 80mm as shown and leave jam nuts loose for loaded setup. Install one at each rear lower control arm, hold the Heim-stud flats with a 15mm wrench and torque stud nuts to 76 Nm (56 ft-lb). Do NOT use a high-speed driver or impact gun on those flange nuts: the own manual warns of thread galling; use hand tools and a torque wrench. |
| Removal / solid mounts / rear fasteners |
Remove rear endlink-to-arm nuts, TWO lower bracket nuts and TWO upper bolts, then remove the original bar/endlink assembly. Position the supplied pillow mounts and solid bushings over the factory holes and reuse factory bolts/nuts. Own printed rear mounting bolts: 65 Nm (49 ft-lb AS PRINTED); mounting nuts: 95 Nm (70 ft-lb). Test rotation BY HAND with moderate force at the arms. IF binding, the selected manual calls for a 1/2-inch or 12mm washer BETWEEN BRACKET AND FRAME, then retest; that is separate from the arm-link articulation spacer. |
| Centering / articulation spacer |
Center the rear bar so bracket-to-bar-end distances are equal left/right. Slide centering rings next to the bushings and secure their setscrews with a 3/32-inch Allen; no numeric setscrew torque is printed. Put the supplied articulation spacer BETWEEN ARM AND ENDLINK so the Heim joint can move through full suspension travel without binding. Arm-to-link bolts: 45 Nm (33 ft-lb). No greasing procedure, nylon-press orientation or outboard-shoulder instruction is borrowed from a separate pillow-mount kit. |
| Arm reinstallation only |
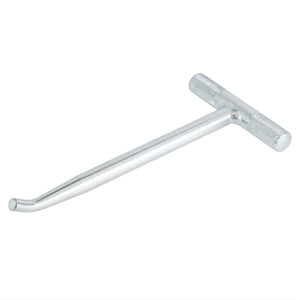
Arms arrive assembled. ONLY if removed, use the illustrated tool to align the splines; the selected REAR bar DIP-to-arm pinch SLOT angle is approximately 55 degrees. Align the pinch-bolt hole with the groove in the bar-end splines and tighten the pinch bolt to 18 Nm (13 ft-lb). Compare side-to-side indexing on a flat surface; minor mismatch is accommodated by adjustable links. The manual also shows a generic front 90-degree illustration, but this selected rear-only package has no front bar or front-arm installation. |
| Loaded preload and unprinted procedures |
Remove preload with the suspension LOADED on suitable lift/ramps/blocks as directed. Disconnect the endlink at ONE end of the rear bar and adjust until the bolt slips through link and arm WITHOUT forcing the arm into alignment. THEN tighten jam nuts. The selected manual gives no initial adjustment-hole position, numeric bar-rate table, wheel torque, fixed recheck mileage, battery disconnect or coding procedure. Do not import middle Position 2, a softest-hole road setup or an initial driving-cycle interval from another kit. |
| Own selected manual |
Selected 440-401007-N: EIGHT-page 00P-0T1026-A; complete bill, every removal/assembly diagram, loaded setup, torque table and arm indexing read/viewed; bill, rear mounting and setup/torque additionally viewed at full resolution |
| Performance evidence |
Manufacturer describes rear launch-traction goals; no selected measured dyno/flow chart, guaranteed launch improvement, tire grip or elapsed-time result established |
| Emissions |
Manufacturer states no CARB EO number required |
What's Included
- ONE assembled REAR sway bar; arms supplied assembled.
- TWO rear solid pillow mounts and TWO rear solid bushings.
- ONE hardware bag listing TWO EACH: M12x1.75 flange nuts; 3/8-24 flange nuts; LH jam nuts; RH jam nuts; socket-head cap screws; spacers; turnbuckles; RH studded Heim joints; LH Heim joints.
- The TWO RH plus TWO LH joints assemble into TWO rear endlinks. The assembly prose says four links, but the selected bill, two rear installation locations and native package photo establish TWO complete links for this rear-only kit; no extra front links or front bar are promised.
- Centering rings are described by the exact primary and shown in the manual. Factory mounting bolts/nuts are reused. No verified grease pack, replacement control arms, filters or intake couplers are included.
About aFe Power
aFe Power develops application-specific intake, filtration, exhaust, cooling, tuning, suspension, drivetrain, and truck-performance components supported by product testing and documented installation requirements.
Related Parts
FAQ
What is the 440-401007-N?The selected rear-only drag-racing sway-bar kit. ONE assembled REAR sway bar; arms supplied assembled. TWO rear solid pillow mounts and TWO rear solid bushings. ONE hardware bag listing TWO EACH: M12x1.75 flange nuts; 3/8-24 flange nuts; LH jam nuts; RH jam nuts; socket-head cap screws; spacers; turnbuckles; RH studded Heim joints; LH Heim joints. The TWO RH plus TWO LH joints assemble into TWO rear endlinks. The assembly prose says four links, but the selected bill, two rear installation locations and native package photo establish TWO complete links for this rear-only kit; no extra front links or front bar are promised. Centering rings are described by the exact primary and shown in the manual. Factory mounting bolts/nuts are reused. No verified grease pack, replacement control arms, filters or intake couplers are included.
Can this be used on the street or public roads?CLOSED-COURSE DRAG RACING ONLY. The current manufacturer explicitly states this system is NOT intended for the street or public roads, and the own manual repeats closed-course racing use. General street/off-road setup or an initial road-driving cycle is not appropriate guidance for this selected race part.
Which Corvette models and years are supported?For the selected 1997–2013 Corvette C5/C6 rear application, subject to the closed-course race-use restriction. The exact current primary and own selected manual agree on the model-year range. The full selected named table independently supports all TEN original scopes plus Grand Sport 2010–2013 below. No C7/C8 or front-bar application is inferred, and chassis restrictions from different control-arm/camber parts are not borrowed.
What materials and adjustment positions are specified?31.75mm THREE-way adjustable REAR torsion bar, three-piece construction using 4130 chromoly with splined ends and clear zinc finish. Arms are orange-anodized 7050-T7 aluminum with broached splines and laser-etched adjustment marks. The supplied rear solid pillow-block mounts are 6061-T6 aluminum; the bushings are molybdenum-impregnated NYLON. These are not polyurethane bushings. Lightweight 3/8-inch rod-end links use aluminum turnbuckles and articulation spacers.
Are there two or four endlinks and how are they tightened?The incomplete turnbuckle wrench flats identify LEFT-hand threads. Assemble TWO rear links to approximately 80mm as shown and leave jam nuts loose for loaded setup. Install one at each rear lower control arm, hold the Heim-stud flats with a 15mm wrench and torque stud nuts to 76 Nm (56 ft-lb). Do NOT use a high-speed driver or impact gun on those flange nuts: the own manual warns of thread galling; use hand tools and a torque wrench. The own selected bill has TWO RH and TWO LH pieces, despite the copied four-link assembly sentence; they form TWO complete rear links.
How are the solid mounts, centering rings and articulation spacers installed?Remove rear endlink-to-arm nuts, TWO lower bracket nuts and TWO upper bolts, then remove the original bar/endlink assembly. Position the supplied pillow mounts and solid bushings over the factory holes and reuse factory bolts/nuts. Own printed rear mounting bolts: 65 Nm (49 ft-lb AS PRINTED); mounting nuts: 95 Nm (70 ft-lb). Test rotation BY HAND with moderate force at the arms. IF binding, the selected manual calls for a 1/2-inch or 12mm washer BETWEEN BRACKET AND FRAME, then retest; that is separate from the arm-link articulation spacer. Center the rear bar so bracket-to-bar-end distances are equal left/right. Slide centering rings next to the bushings and secure their setscrews with a 3/32-inch Allen; no numeric setscrew torque is printed. Put the supplied articulation spacer BETWEEN ARM AND ENDLINK so the Heim joint can move through full suspension travel without binding. Arm-to-link bolts: 45 Nm (33 ft-lb). No greasing procedure, nylon-press orientation or outboard-shoulder instruction is borrowed from a separate pillow-mount kit.
What applies if the splined arms are removed?Arms arrive assembled. ONLY if removed, use the illustrated tool to align the splines; the selected REAR bar DIP-to-arm pinch SLOT angle is approximately 55 degrees. Align the pinch-bolt hole with the groove in the bar-end splines and tighten the pinch bolt to 18 Nm (13 ft-lb). Compare side-to-side indexing on a flat surface; minor mismatch is accommodated by adjustable links. The manual also shows a generic front 90-degree illustration, but this selected rear-only package has no front bar or front-arm installation.
How is preload removed and which follow-up instructions are supplied?Remove preload with the suspension LOADED on suitable lift/ramps/blocks as directed. Disconnect the endlink at ONE end of the rear bar and adjust until the bolt slips through link and arm WITHOUT forcing the arm into alignment. THEN tighten jam nuts. The selected manual gives no initial adjustment-hole position, numeric bar-rate table, wheel torque, fixed recheck mileage, battery disconnect or coding procedure. Do not import middle Position 2, a softest-hole road setup or an initial driving-cycle interval from another kit.
Installation Instructions
- Confirm aFe 440-401007-N, actual C5/C6 application and the complete eight-page selected manual. CLOSED-COURSE DRAG RACING ONLY. The current manufacturer explicitly states this system is NOT intended for the street or public roads, and the own manual repeats closed-course racing use. General street/off-road setup or an initial road-driving cycle is not appropriate guidance for this selected race part. Use proper vehicle support and current exact service requirements.
- Remove rear endlink-to-arm nuts, TWO lower bracket nuts and TWO upper bolts, then remove the original bar/endlink assembly. Position the supplied pillow mounts and solid bushings over the factory holes and reuse factory bolts/nuts. Own printed rear mounting bolts: 65 Nm (49 ft-lb AS PRINTED); mounting nuts: 95 Nm (70 ft-lb). Test rotation BY HAND with moderate force at the arms. IF binding, the selected manual calls for a 1/2-inch or 12mm washer BETWEEN BRACKET AND FRAME, then retest; that is separate from the arm-link articulation spacer.
- The incomplete turnbuckle wrench flats identify LEFT-hand threads. Assemble TWO rear links to approximately 80mm as shown and leave jam nuts loose for loaded setup. Install one at each rear lower control arm, hold the Heim-stud flats with a 15mm wrench and torque stud nuts to 76 Nm (56 ft-lb). Do NOT use a high-speed driver or impact gun on those flange nuts: the own manual warns of thread galling; use hand tools and a torque wrench.
- Center the rear bar so bracket-to-bar-end distances are equal left/right. Slide centering rings next to the bushings and secure their setscrews with a 3/32-inch Allen; no numeric setscrew torque is printed. Put the supplied articulation spacer BETWEEN ARM AND ENDLINK so the Heim joint can move through full suspension travel without binding. Arm-to-link bolts: 45 Nm (33 ft-lb). No greasing procedure, nylon-press orientation or outboard-shoulder instruction is borrowed from a separate pillow-mount kit.
- Arms arrive assembled. ONLY if removed, use the illustrated tool to align the splines; the selected REAR bar DIP-to-arm pinch SLOT angle is approximately 55 degrees. Align the pinch-bolt hole with the groove in the bar-end splines and tighten the pinch bolt to 18 Nm (13 ft-lb). Compare side-to-side indexing on a flat surface; minor mismatch is accommodated by adjustable links. The manual also shows a generic front 90-degree illustration, but this selected rear-only package has no front bar or front-arm installation.
- Remove preload with the suspension LOADED on suitable lift/ramps/blocks as directed. Disconnect the endlink at ONE end of the rear bar and adjust until the bolt slips through link and arm WITHOUT forcing the arm into alignment. THEN tighten jam nuts. The selected manual gives no initial adjustment-hole position, numeric bar-rate table, wheel torque, fixed recheck mileage, battery disconnect or coding procedure. Do not import middle Position 2, a softest-hole road setup or an initial driving-cycle interval from another kit.
California Proposition 65 warning: this product can expose you to chemicals known to the State of California to cause cancer and reproductive harm.